Grounding and choking 2025
Grounding and Choking 2025
Dealing with RF noise and interference is one of the biggest challenges in any shack. To improve both performance and safety, I rebuilt the entire grounding and choking system. The goal is not perfection, but a station that is quiet, stable, and reliable.
Two Layers of Protection
All cables that enter the shack already pass through ferrite chokes outside. What I have built inside is a second barrier: extra chokes on DC lines, control cables, and mains power before they reach the equipment. This two-step approach keeps as much RF as possible from entering the shack.
Grounding Every Device
Every single device — radios, amplifiers, controllers, PCs, monitors, internet gear — has its own dedicated ground lead to the aluminum ground bar. Even my monitors are grounded individually. This ensures that all equipment shares the same reference potential.
Using Ferrite Chokes
Ferrite chokes are installed wherever they are most effective. Some provide higher impedance than others, depending on cable type and number of turns.
Measurements I made show values typically between 500 and 1000 Ohms, measured in the HF range (1–30 MHz). This is not perfect, but it is already a very solid start for reducing common-mode currents. Adding a measurement screenshot here could make this even more concrete for reference.
Reusing Coax for Ground Straps
For larger devices I use thick braided ground straps. In fact, I reused braid from old RG218 coax. Short pieces of coax cannot be used anymore, but the woven shield is excellent as flexible ground strap. Anyone with leftover pieces of RG213 can do the same: strip the shield and use it as bonding braid instead of throwing it away. For smaller devices, I use 6 mm² stranded copper wire, which is flexible and reliable.
Safety Note
The house earth connection remains active at all times. Ferrite chokes are only there to suppress RF, not to break the protective earth path. All bonding is done with mechanical fasteners (screws or clamps) — never solder — to ensure the connection remains solid for fault current or lightning. It is also important to keep all connections clean and corrosion-protected.
Still Work in Progress
Although much has been done, this is not the final version. One of the next steps will be treating the control cables of my remote RX systems in the same way: ferrite at the shack entry, additional chokes near the distribution, and a direct bond to the ground bar.
Conclusion
Is this perfect? No. More ferrites could always be added for higher impedance. But I believe this setup should be a minimum standard in every serious shack. If you choose to copy this approach, you do so at your own responsibility. My goal is not to be a perfect example, but to show how much difference proper grounding and choking can make.
Keeping the Shack Clean – Fighting RF Noise

Starting with the Control Cables
The first step in improving my shack was to work on the control cables that run from outside into the shack. These lines can easily pick up RF and bring it straight into the equipment.
To reduce this, I added ferrite chokes on every control cable as soon as it enters the shack. Each cable now passes through multiple ferrite cores to raise common-mode impedance and block unwanted RF currents.
The exact values of the chokes can always be optimized further, but this setup already makes a big difference. It’s a solid starting point that improves receive performance and lowers interference inside the shack.
This way, the control cables are no longer a weak spot, and the RF energy stays where it belongs – in the antenna system.
Grounding the Control Cable Grounds
The next important step was connecting all the grounds of the control cables directly to a single ground bar.
This copper braid is bonded to my main ground system and provides a clean, low-impedance path for unwanted currents.
By tying every control cable ground together at this point, I prevent potential differences and reduce the chance of common-mode currents sneaking into the shack.
It’s a simple but very effective improvement: grounding everything at one place already makes the whole setup more stable and quiet.


DC Power Distribution
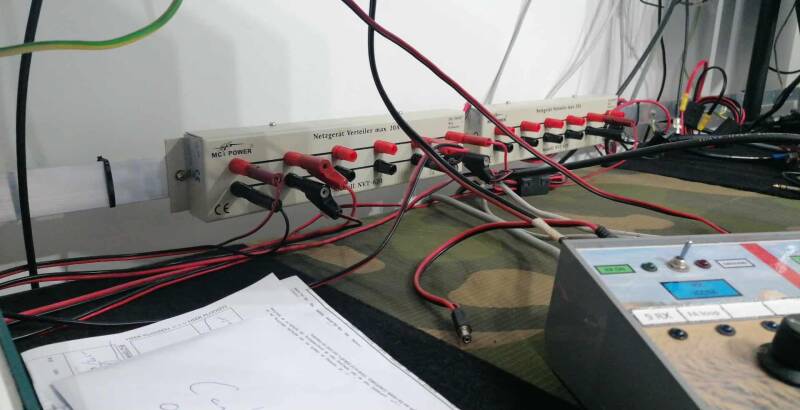
In the picture you can see my DC distribution units, which are used to power all the peripheral equipment in the shack. These include controllers, switches, and other support electronics.
The DC distributors blocks are mounted on the grounding bar in the shack.
My transceivers and amplifiers are connected to a separate power supply to ensure stable and interference-free operation.
An important detail: All DC negatives are bonded to the shack ground bar. This provides a common reference point and helps to avoid noise issues and unwanted voltage differences.
DC Cables and Chokes
All DC cables in my shack are equipped with ferrite chokes at two points:
One choke is placed at the distribution point of the power supply.
A second choke is placed close to the device being powered.
This ensures that any unwanted HF currents traveling along the cables are suppressed both at the source and right before entering the equipment. As a result, the risk of RFI is greatly reduced and all accessories continue to operate reliably, even at high transmit power.
In addition, all cables are properly labeled, making the setup organized and easy to maintain.


Remote RX System
For my remote RX system, I paid extra attention to suppressing interference using chokes. These are placed at multiple points in the chain to block unwanted common-mode signals as effectively as possible.
Inside the shack: a choke is installed right at the transceiver.
At the remote RX distributor: there is a choke right before the distributor, and additional chokes are built into the distributor itself.
Future expansion: when the RX is placed outside, it will also get a choke directly at the RX unit. On top of that, another choke will be added just before the cables enter the shack.
With this layered approach, the chance of interference traveling along the RX lines into the shack is minimized, keeping the reception clean even with strong transmit power or local noise sources.


Grounding the Transmitter and Amplifier
Both my transmitter and amplifier are bonded with a short, thick braided grounding strap to the shack ground bar.
I use a braided strap instead of a single solid wire because the braid offers a much lower impedance to RF currents. At radio frequencies, it is not just about resistance, but mainly about inductance and surface area. The wide, flat surface of a braid provides better conductivity for high-frequency currents compared to a round solid cable.
Additionally, the grounding strap is kept as short as possible, minimizing the path length for any unwanted currents. This reduces potential RF feedback, improves safety, and ensures stable operation of the transmitter and amplifier, even at high power levels.
Grounding/Filtering the ALS-600 Power Supply
For my Ameritron ALS-600 amplifier, I added a dedicated ground connection to the power supply. The chassis is bonded directly to the main grounding bar in the shack using a wide braided copper strap.
I use braid instead of solid cable because it provides a much larger surface area, which is especially effective at RF frequencies. The strap is kept as short and direct as possible to minimize impedance and to ensure that any unwanted RF currents are safely directed to ground.
This upgrade improves both safety and performance. It reduces the risk of RF feedback into the amplifier and helps create a clean grounding system where all equipment shares a common reference point.


Filtering the ALS-600 Power Supply
Even the mains cable of the Ameritron ALS-600 power supply has been treated against unwanted RF.
Since this cable cannot easily be looped through a large toroid (without removing the factory plug), I used five snap-on ferrite chokes (mix 31) in series.
This solution provides a solid level of common-mode suppression across the HF bands (typically 800–1000 Ω from 3–30 MHz), effectively reducing the chance of RF currents traveling back into the shack through the 230 V line.
While a toroidal core with multiple turns would give a slightly higher impedance, the snap-on approach is the most practical and non-destructive solution here. It ensures the ALS-600 operates cleanly and without introducing noise or RF feedback into the mains network.
Rotor Controller – Yaesu G-2800DXC
For controlling my antennas I use the Yaesu G-2800DXC rotor controller.
Since unwanted RF and noise can also couple into the control unit, I applied the following measures:
-
The 220V power cable is fitted with two snap-on ferrite cores (mix 31), with the cable wound six times through the cores. This helps to suppress common-mode currents coming from the mains.
-
The controller is directly bonded to the shack ground strip using a 6 mm² grounding wire.
With this combination of ferrite filtering and solid grounding, the rotor controller operates reliably and remains free from RF interference.


Rotor Cable Choking
For the rotor control cable of my Yaesu G-2800DXC, I added a choke using a FT240-31 ferrite core. The cable is wound 3 turns through the core. While more turns would increase the choking effect, the thickness and stiffness of the rotor cable make additional turns impractical.
This setup already provides a solid reduction of common-mode currents traveling along the control cable. It’s a practical compromise: enough suppression without putting too much mechanical stress on the cable or connectors.
Later on, if needed, this choke can be complemented with additional snap-on ferrites or another toroid further down the line for extra suppression.
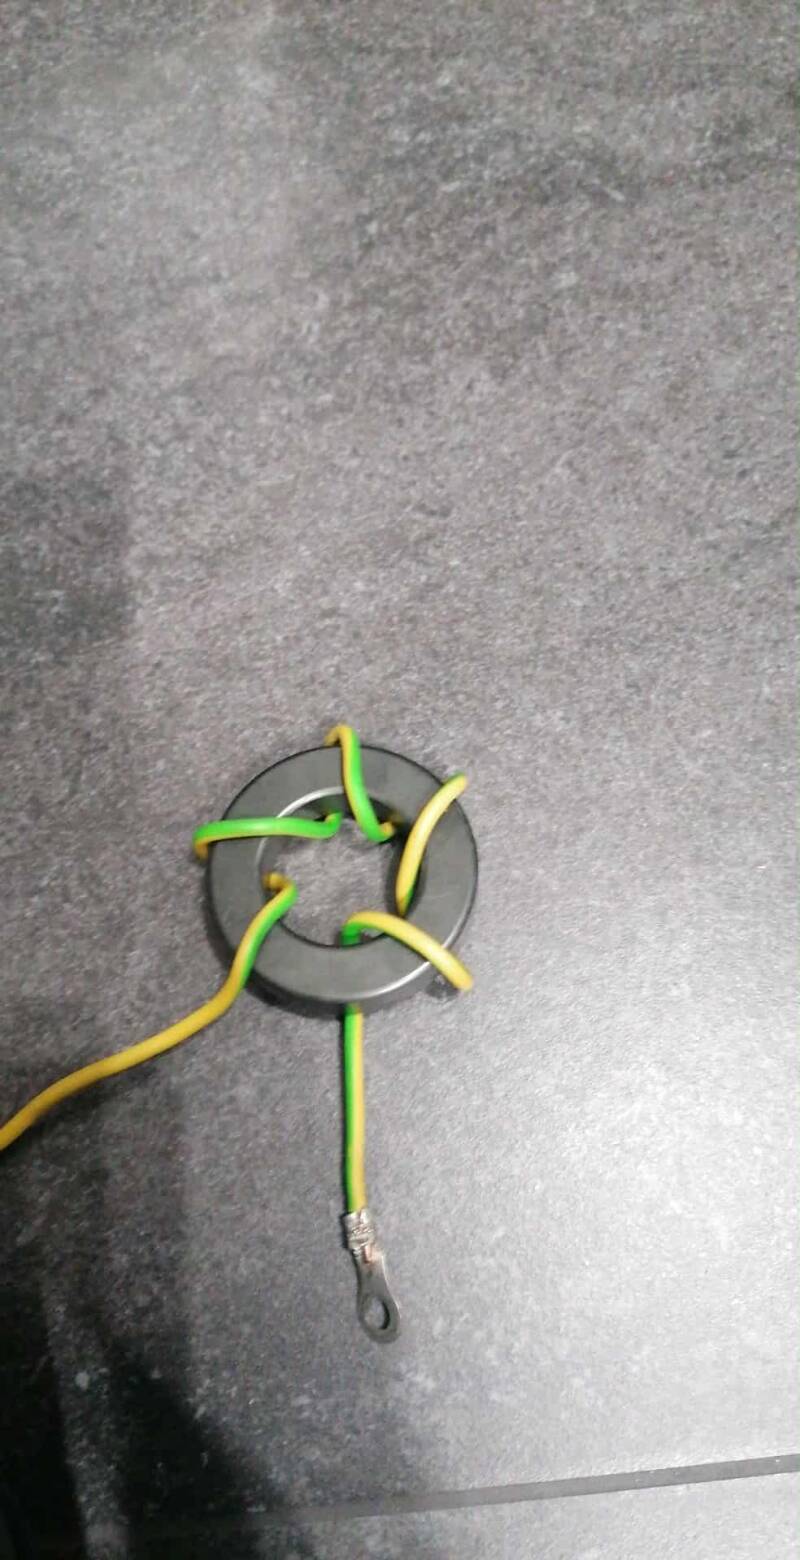
Shack Grounding – House Earth Choke
On the picture you can see that I added five turns of the house earth wire (2.5 mm²) through an FT240-31 core.
It is possible to wind even more turns, but this is not recommended: too many turns make the choke behave like a coil, which can actually reduce its ability to safely handle fault or lightning currents.
Inside my shack’s fuse box there is already one choke on the incoming house earth. This core is therefore the second choke in the system. Its main role is not safety (the direct ground path is still there), but to keep the earth potential equal for all devices in the shack and to reduce RF currents riding on the protective earth.
This way the grounding system keeps its protective function while at the same time reducing unwanted noise and hum loops in the station.

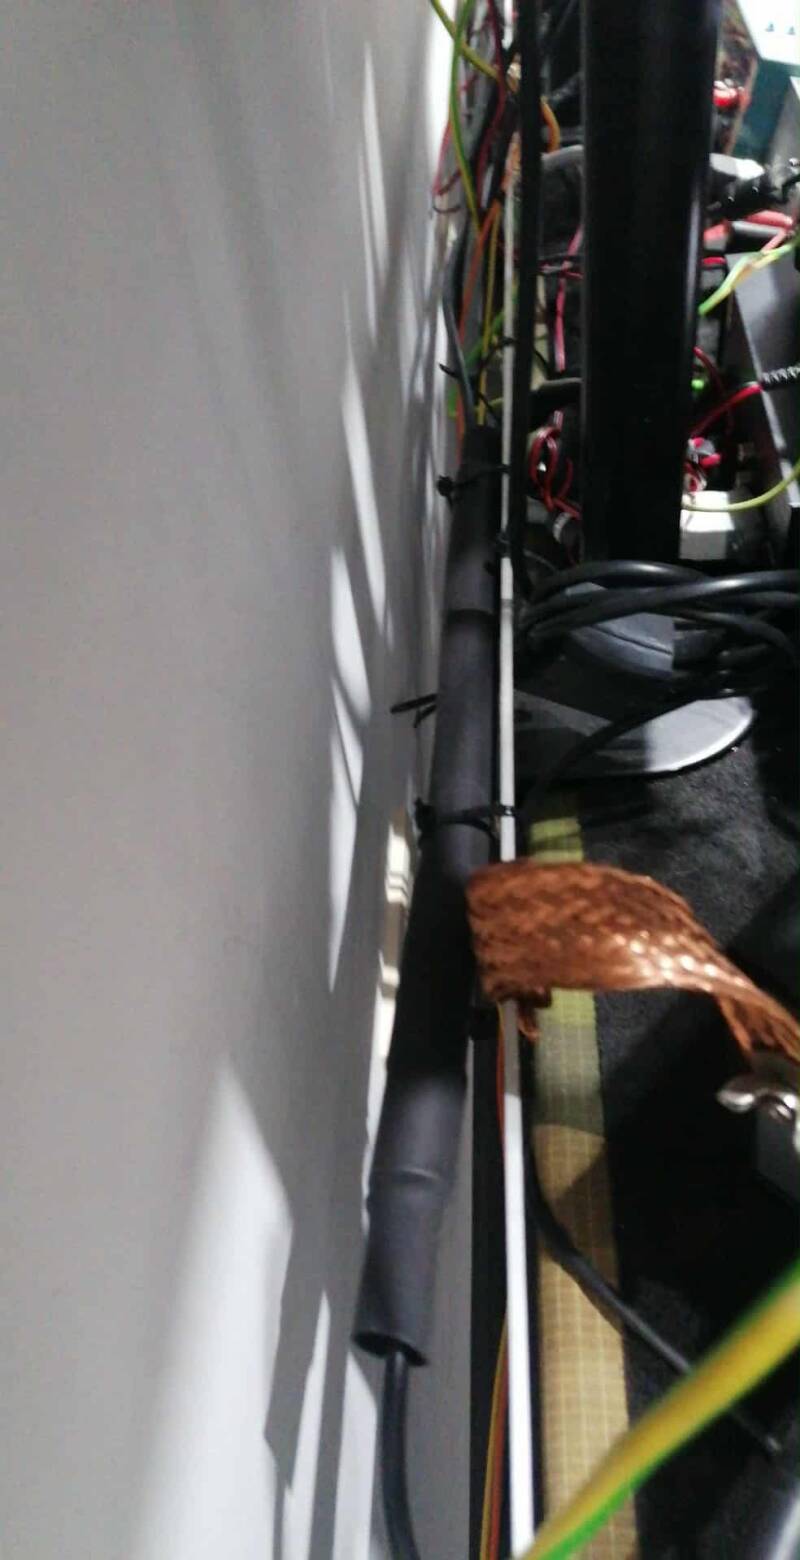
Shack Grounding – Pre-installed House Earth Cable
This ground cable was already prepared during the renovation of my shack.
It comes directly from the main fuse box, where the first choke on the house earth is already installed.
By planning this cable in advance, I made sure the shack has a dedicated and direct earth connection. This ensures both safety and stable RF grounding conditions before any additional chokes or bonding were added inside the shack.
My e-mail is my CALL@telenet.be
Create Your Own Website With JouwWeb